Vanilla Hooks (outside React)

Hooks are a pattern, not something usable with React library only, and this post would like to explain, and walk through, some interesting possibility.
What are hooks?
Hooks are nothing more, and nothing less, than a wrap around a generic callback. The callback itself is not a hook, unless it’s being handled by a hook-helper, in this case provided by µhooks library, which is the tiniest, and fastest, I know out there, and “it just works” ™.
As example, this is a generic callback that uses internally some hook-helper, but it won’t ever work as expected, unless it’s wrapped by a hook-library helper.
// not a hook until wrapped
const callback = (initial) => {
  const [value, update] = useState(initial);
  console.log(value);
  setTimeout(update, 1000, value + 1);
};
It is important to remember that, unless used as helper itself, callbacks can’t benefit from hooks helpers, because these callbacks need to be orchestrated.
import {hooked, useState} from '//unpkg.com/uhooks?module';// this is now a hook
const incrementalState = hooked(callback);// and it can be initialized as such
incrementalState(0);
Reading the console logs in this CodePen example, would show an incremental counter that goes from 0 to N, which is what we’d expect.
How does it work?
The short version of the story, is that each time the update function executes, provided by the useState helper, the hooked callback gets invoked again, and the useState helper will know, at runtime, what’s the last updated value to return, ignoring the initial value provided the first time such hook got executed.
An extremely minimalist hook implementation and explanation can be found in this gist too.
The long version of the story is described in this older post of mine, but it’s not necessary to understand all the internals, while it’s necessary to remember that each hook needs to be handled a part, so that to start logging from zero in parallel, as example, we cannot invoke incrementalState(0) again, ’cause we need to create a new hook through the same helper.
const parallelState = hooked(callback);The math is simple: one hook is equal to one, and one only, callback wrap.
We can manually invoke a hook as many times as we like, but initialized states will always reflect their current value, so that calling incrementalState(123) won’t ever log, reset, or start, the current counting or its value, and it’ll just create a new setTimeout, so that now everything is logged twice each second.
Feel free to play with the previous CodePen to test it yourself.
Hooks & DOM Elements
I’m pretty sure showcasing hooks with a silly counter gets easily boring, but that’s already the “ABC” of how hooks works, and we can explore some other helper to create standalone DOM Elements, in this case, useRef:
const useElement = (name, attributes = {}) => {
  const ref = useRef(null);
  return ref.current || (ref.current = Object.assign(
    document.createElement(name),
    attributes
  ));
};
The useRef is a good helper to create anything we need once. Its initial value would be stored to an always-same object reference, and as current property.
Since this is a helper, and not a hook itself, it’s not necessary to wrap it as hooked function, as it will be used within hooked functions instead:
const Button = attributes => hooked(text => {
  const element = useElement('button', attributes);
  const [count, update] = useState(0);
  element.textContent = `${text} clicked ${count}`;
  element.onclick = () => update(count + 1);
  return element;
});const simple = Button({className: 'simple'});
const complex = Button({className: 'complex'});document.body.append(
  simple('simple button'),
  complex('complex button')
);
The live demo this time showcases two counters (I know, still boring… bear with me), and the important thing to understand, is that once an element has been created, it will always be exactly the same element:
console.log(
  simple('simple button') ===
  simple('simple button')
); // true
We can update its prefix content via simple('just simple') and it’ll still be the exact same element.
Reactive State
As we’re already introducing components definition through hooks, and since counting is not even close to be a real-world use case, we can already find a way to avoid writing useState all over the place, for each single state to handle, and deal instead with an object that would provide state details and it’s able to update the current state with ease:
const {defineProperties} = Object;
const useReactive = object => {
  const properties = {};
  for (const key in object) {
    const [value, set] = useState(object[key]);
    properties[key] = {get: () => value, set};
  }
  return defineProperties({}, properties);
};
With above helper in place, the Button component factory can be simplified in a more readable way, that would also scale with other properties:
const Button = attributes => hooked(text => {
  const element = useElement('button', attributes);
  const state = useReactive({count: 0});
  element.textContent = `${text} clicked ${state.count}`;
  element.onclick = () => state.count++;
  return element;
});
Check this live demo to play around this pattern.
Handling Events
Similarly, as we could easily have more states to handle, we could as well have more events to deal with, and here the little gotcha:
- DOM Level 0 events are both easy to set, as
element.onclick = thingy, but also easy to mess with, because there can be only one Level 0 event set per element, so that our component could easily either leak its listeners, or never react due some other script event override - tracking previous listeners, so that these get removed and replaced per each state update, is tedious and error prone
To help solving these pain points, there’s the great handleEvent standard, that would allow us to never care about tracking previous listeners, ’cause if the handler is always the same, nothing happens twice or more:
const {defineProperties} = Object;
const useHandler = (element, handler) => {
  const ref = useRef(null);
  // update the user handler each time
  if (ref.current)
    ref.current._ = handler;
  // but create the real handler once
  else
    ref.current = {
      _: handler,
      handleEvent(e) {
        this._[e.type](e);
      }
    };
  // so that adding it N times won't result in N events
  for (const key in handler)
    element.addEventListener(key, ref.current);
};
With above helper, the Button factory now would look like this:
const Button = attributes => hooked(text => {
  const state = useReactive({count: 0});
  const element = useElement('button', attributes);
  useHandler(element, {
    click() {
      state.count++;
    }
  });
  element.textContent = `${text} clicked ${state.count}`;
  return element;
});
Feel free to play around the related live demo.
Combining Helpers
If two helpers are somehow frequently used, and there is a way to disambiguate their intents, it might be a good solution to put these helpers together, avoiding repeating the same code each time.
const {defineProperties} = Object;
const useReactiveHandler = (element, object) => {
  const ref = useRef(null);
  // create the real handler once
  if (!ref.current)
    ref.current = {
      _: {},
      handleEvent(e) {
        _[`on${e.type}`](e);
      }
    };
  const {_} = ref.current;
  const properties = {};
  for (const key in object) {
    // listeners prefixed via on
    if (/^on/.test(key)) {
      element.addEventListener(key.slice(2), ref.current);
      _[key] = object[key];
    }
    // methods simply copied over
    else if (typeof object[key] === 'function')
      _[key] = object[key];
    // properties made reactive
    else {
      const [value, set] = useState(object[key]);
      properties[key] = {
        configurable: true,
        get: () => value,
        set
      };
    }
  }
  return defineProperties(_, properties);
};
With above helper, we can now define both handlers and reactive properties at once, making our Button factory look like:
const Button = attributes => hooked(text => {
  const element = useElement('button', attributes);
  const {count} = useReactiveHandler(element, {
    count: 0,
    onclick(event) {
      this.count++;
    }
  });
  element.textContent = `${text} clicked ${count}`;
  return element;
});
Once again, check the live demo to see how this works.
What have we learned so far
The main take-away, up to this paragraph, is that hooks are just primitives able to compose really well together, so that creating ad-hoc helpers for our cases should be straight forward, as long as we pick “the right hook for the job”.
We’ve only explored useState and useRef so far, and that’s scratching the surface of what’s possible to do with hooks, but I hope it’s clear we can already do a lot with just these two primitives around.
Now take a break, have a walk, or play again with what we’ve done so far, so that once you’re back, we can talk about more complex examples 😉
A “Todo” App
I know this won’t be overexciting for many, but the point of X-App is to relate inner components with the whole App itself, as each component update could require an App update too, and having nested hooks is also something to talk about, as there are various solutions to consider to compose this pattern.
For example, each button described so far, is a standalone component, also able to implicitly dispatch a click event to any outer component, but knowing how to deal with delegated events, within hooks, and somehow shared data, might be worth this extra example.
In a nutshell…
What we are going to create is a very simple structure that allows users to type some item, add it via Enter, being able to flag each item as done, or not.
The very first version of this app is live in CodePen, so let’s see what it does.
The structure
We won’t focus too much on this structure correctness (it’s not), rather on its functionality.
<div>
  <input>
  <ul>
    <li>
      <label>
        {{value}}
        <input type=checkbox>
      </label>
    </li>
  </ul>
</div>
Like any other dynamic application, we’ll be dealing with some data, in this case representing a list of tasks, or items, where each task carries most relevant information: value and done.
The Task/Item Hook
const Item = () => hooked(item => {
  const {value, done} = item;
  const li = useElement('li', {
    // class name based on the item state
    className: done ? 'done' : ''
  });
  const label = useElement('label');
  const span = useElement('span', {
    // item value can be edited/updated
    textContent: value + ' '
  });
  const checkbox = useElement('input', {
    // the checked state is handled reactively
    type: 'checkbox'
  });
  useReactiveHandler(checkbox, {
    checked: done,
    onclick() {
      // update the current task/item state
      item.done = !done;
      this.checked = !done;
    }
  });
  // initialize this component once
  if (!li.hasChildNodes()) {
    label.append(span, checkbox);
    li.append(label);
  }
  return li;
});
Hopefully self explanatory, if we understood previous part of this article, the Item component is a standalone <li> element that would change its className whenever its state changes, simply updating its reactive checked property, after also updating its reference value.
Differently from previous examples
The useElement presented before was setting elements properties only once, but here the helper should be capable of updating these, in case of changes, each time.
const useElement = (name, attributes = {}) => {
  const ref = useRef(null);
  if (!ref.current)
    ref.current = document.createElement(name);
  // update properties each time
  return Object.assign(ref.current, attributes);
};
The Todo App
At this point all we need is a container able to render these items and create new items too.
const Todo = () => hooked(items => {
  // lazy way to have always same WeakMap ... not ideal
  const {current: references} = useRef(new WeakMap);
  // basic structure
  const app = useElement('div');
  const input = useElement('input');
  const list = useElement('ul');
  // update the list whenever a new task/item is added
  useReactiveHandler(input, {
    count: items.length,
    onkeypress({key}) {
      if (key === 'Enter') {
        const value = input.value.trim();
        if (value && !items.find(({value: v}) => v === value)) {
          // place new tasks on top
          items.unshift({value, done: false});
          input.value = '';
          this.count++;
        }
      }
    }
  });
  // lazy way to update this view ...
  // just re-append everything
  app.append(input, list);
  items.forEach(item => {
    // create new tasks/items once via reference
    if (!references.has(item)) {
      const hook = Item();
      references.set(item, hook(item));
    }
    list.append(references.get(item));
  });
  return app;
});const App = Todo();
To recap:
- the
Appis a hook that handles a list of tasks/items via an input field, and it’s capable of adding new tasks/items when the Enter key happens - the
Appupdates its content each time a new task is created, and it relates each item to a unique data-point used as weak key.
// create a new App with an empty list
document.body.append(App([]));
The ugly parts…
- the item leaks its state through data mutation, and such change cannot be detected outside its closure, unless each item is reactive too, but that’s rarely the case (thinking about JSON requests, etc). In case we’d like to show the total amount of tasks, and the amount of completed tasks, changing items state without updating the whole view won’t easily scale.
- compared to React and its JSX special syntax, it’s easy to feel like components creation and initialization is pretty verbose and error prone
- the
WeakMapis created each time for no reason, which is easy to fix, using the.currenttrick viauseRef, but also more verbose for very little gain
there are probably other ugly parts, but these 3 make me already want to rewrite, or refactor, this Todo project… but how?
Introducing µland
The µland module is a µhooks based library that tries to improve the vanilla hooks states in the following way:
- it’s declarative, thanks to µhtml exposed via its core
- it provides helpers to coordinate containers/components out of the box
- it requires less boilerplate, helpers, around
Our new version of the App would indeed be reduced to 45 LOC, where the Item component would now look like this:
const Item = Component(item => {
  const {value, done} = item;
  // used to notify updates, no value needed
  const [_, update] = useState();
  return html`
    <li class=${done ? 'done' : ''}>
      <label>
        ${value}
        <input
          type=checkbox
          .checked=${done}
          onclick=${() => {
            item.done = !done;
            update();
          }}
        >
      </label>
    </li>
  `;
});
so that no previous helper is needed anymore, as defining elements, their attributes, events, or properties, using the .propName convention, is integrated in the template literal based engine.
Not only the Item component is simpler, the Todo component is also now shorter and easier to read:
const Todo = Component(items => {
const [count, update] = useState(items.length);
const done = items.filter(({done}) => done).length;
return html`
<div data-info=${`Total: ${count} - Done: ${done}`}>
<input onkeypress=${({currentTarget: input, key}) => {
if (key === 'Enter') {
const value = input.value.trim();
if (value && !items.find(({value: v}) => v === value)) {
items.unshift({value, done: false});
input.value = '';
update(count + 1);
}
}
}}>
<ul>
${items.map(Item)}
</ul>
</div>
`;
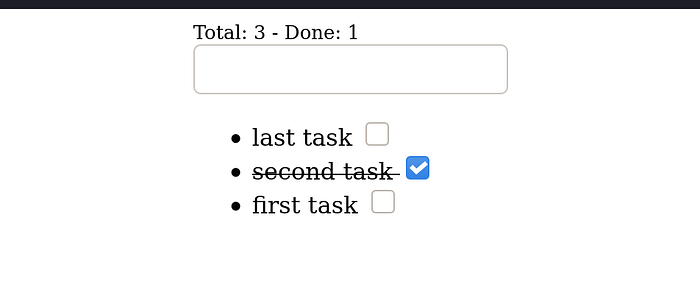
});The Todo’s update(count + 1) would re-render the list of items, after prepending the last entry, while the Item’s update() would propagate through the top most rendered element, so that now completed tasks would also be reflected in the main container as data-info.
// bootstrap the Todo App
render(document.body, Todo([]));
Define the element where to render our new application, and see it live.
Keyed vs Non Keyed
If we look closer to the current demo, there is something to consider:
${items.map(Item)}The template literal engine is smart enough to update each time all properties, but without a reference we’re working in a key-less mode.
Inspecting the current DOM, we’ll see that changes might be applied to multiple items, but if we’d like to be sure that a single item represent a specific component, we still need to use a reference, in both the Todo app, and within each Item.
In order to do so, we can use another hook helper: useMemo
const Todo = Component(items => {
  const tasks = useMemo(() => new WeakMap, items);
  // ...
  return html`
    <div data-info=${`Total: ${count} - Done: ${done}`}>
      ...
      <ul>
        ${items.map(item => {
          if (!tasks.has(item))
            tasks.set(item, Item(item));
          return tasks.get(item);
        })}
      </ul>
    </div>
  `;
});
Such helper executes the callback only when its guard changes, creating in this specific case only one WeakReference, as opposite of creating it per each update as it was before.
The items.map dance can now use such reference, to create new components only when it’s needed, and re-order (DOM diffing) others instead of updating each time the whole list.
The other change, at this point, is to relate such item to the piece of DOM it represents, in a unique way:
const Item = Component(item => {
  const {value, done} = item;
  const [_, update] = useState();
  return html.for(item, 'todo-item')`
    ...
  `;
});
The html.for(ref[, id]) is the way to go, and the id in this case helps us reuse the same item around the page, without also moving the same node.
Feel free to play around with the latest version of this app.
Still missing…
Our current App is still mutating items from the inside, and I can already imagine all “immutable-data” fans swearing…
It’s worth also considering that the empty useState, invoked just to propagate the state change, is more a hack than a solution.
What we could do instead, is pass along the application context, which enables any component to trigger an update that every other using the same context will be notified about.
const Todo = Component(context => {
  const items = useContext(context);
  // no need to useMemo, as items are always new anyway
  // ...
  return html`
    <div data-info=${`Total: ${count} - Done: ${done}`}>
      ...
      <ul>
        ${items.map(item => Item({context, item}))}
      </ul>
    </div>
  `;
});
While in React a context is usually represented as yet another JSX node, in uhooks, hence in uland too, there is an utility to create one:
render(document.body, Todo(createContext([])));The useContext(context) will return whatever value the context carries, but the context itself also provides a way to update its value, automatically propagating around the application, resulting in a global update:
const Item = Component(({context, item}) => {
  const items = useContext(context);
  const {value, done} = item;
  return html`
    <li class=${done ? 'done' : ''}>
      <label>
        ${value}
        <input
          type=checkbox
          .checked=${done}
          onclick=${() => {
            const i = items.indexOf(item);
            // provide a new list of items
            // with a new item instead of mutating
            context.provide([
              ...items.slice(0, i),
              {value, done: !done},
              ...items.slice(i + 1);
            ]);
          }}
        >
      </label>
    </li>
  `;
});
This last example is also live, and the most important things to notice here:
- there’s no need to use
html.for(...)because each item change becomes a new reference so we’d just bother aWeakMapfor not much gain - the intent is cleaner than before, but nodes are now key-less again
Regarding the last point, not only it shouldn’t really matter unless keyed results are absolutely mandatory, but if we look closer we could eventually associate each component to its own value, and use such value as unique key, as the logic doesn’t allow us to add twice the same task.
A simple Map in this case would work better, and the only extra thing to remember, in case the App is extended to also remove already done items, is that keys should also be removed from this Map, but I’ll leave this part as an exercise for the reader.
Conclusions
I hope you enjoyed this step-by-step Todo App creation, using both vanilla DOM and tiny helpers born to solve these tasks with ease, so that it should be clear by now that using hooks is not necessarily something confined within the React ecosystem, but something enjoyable via any other standard too.

